We promised an update following our previous posting about our new shop project. Here it is!
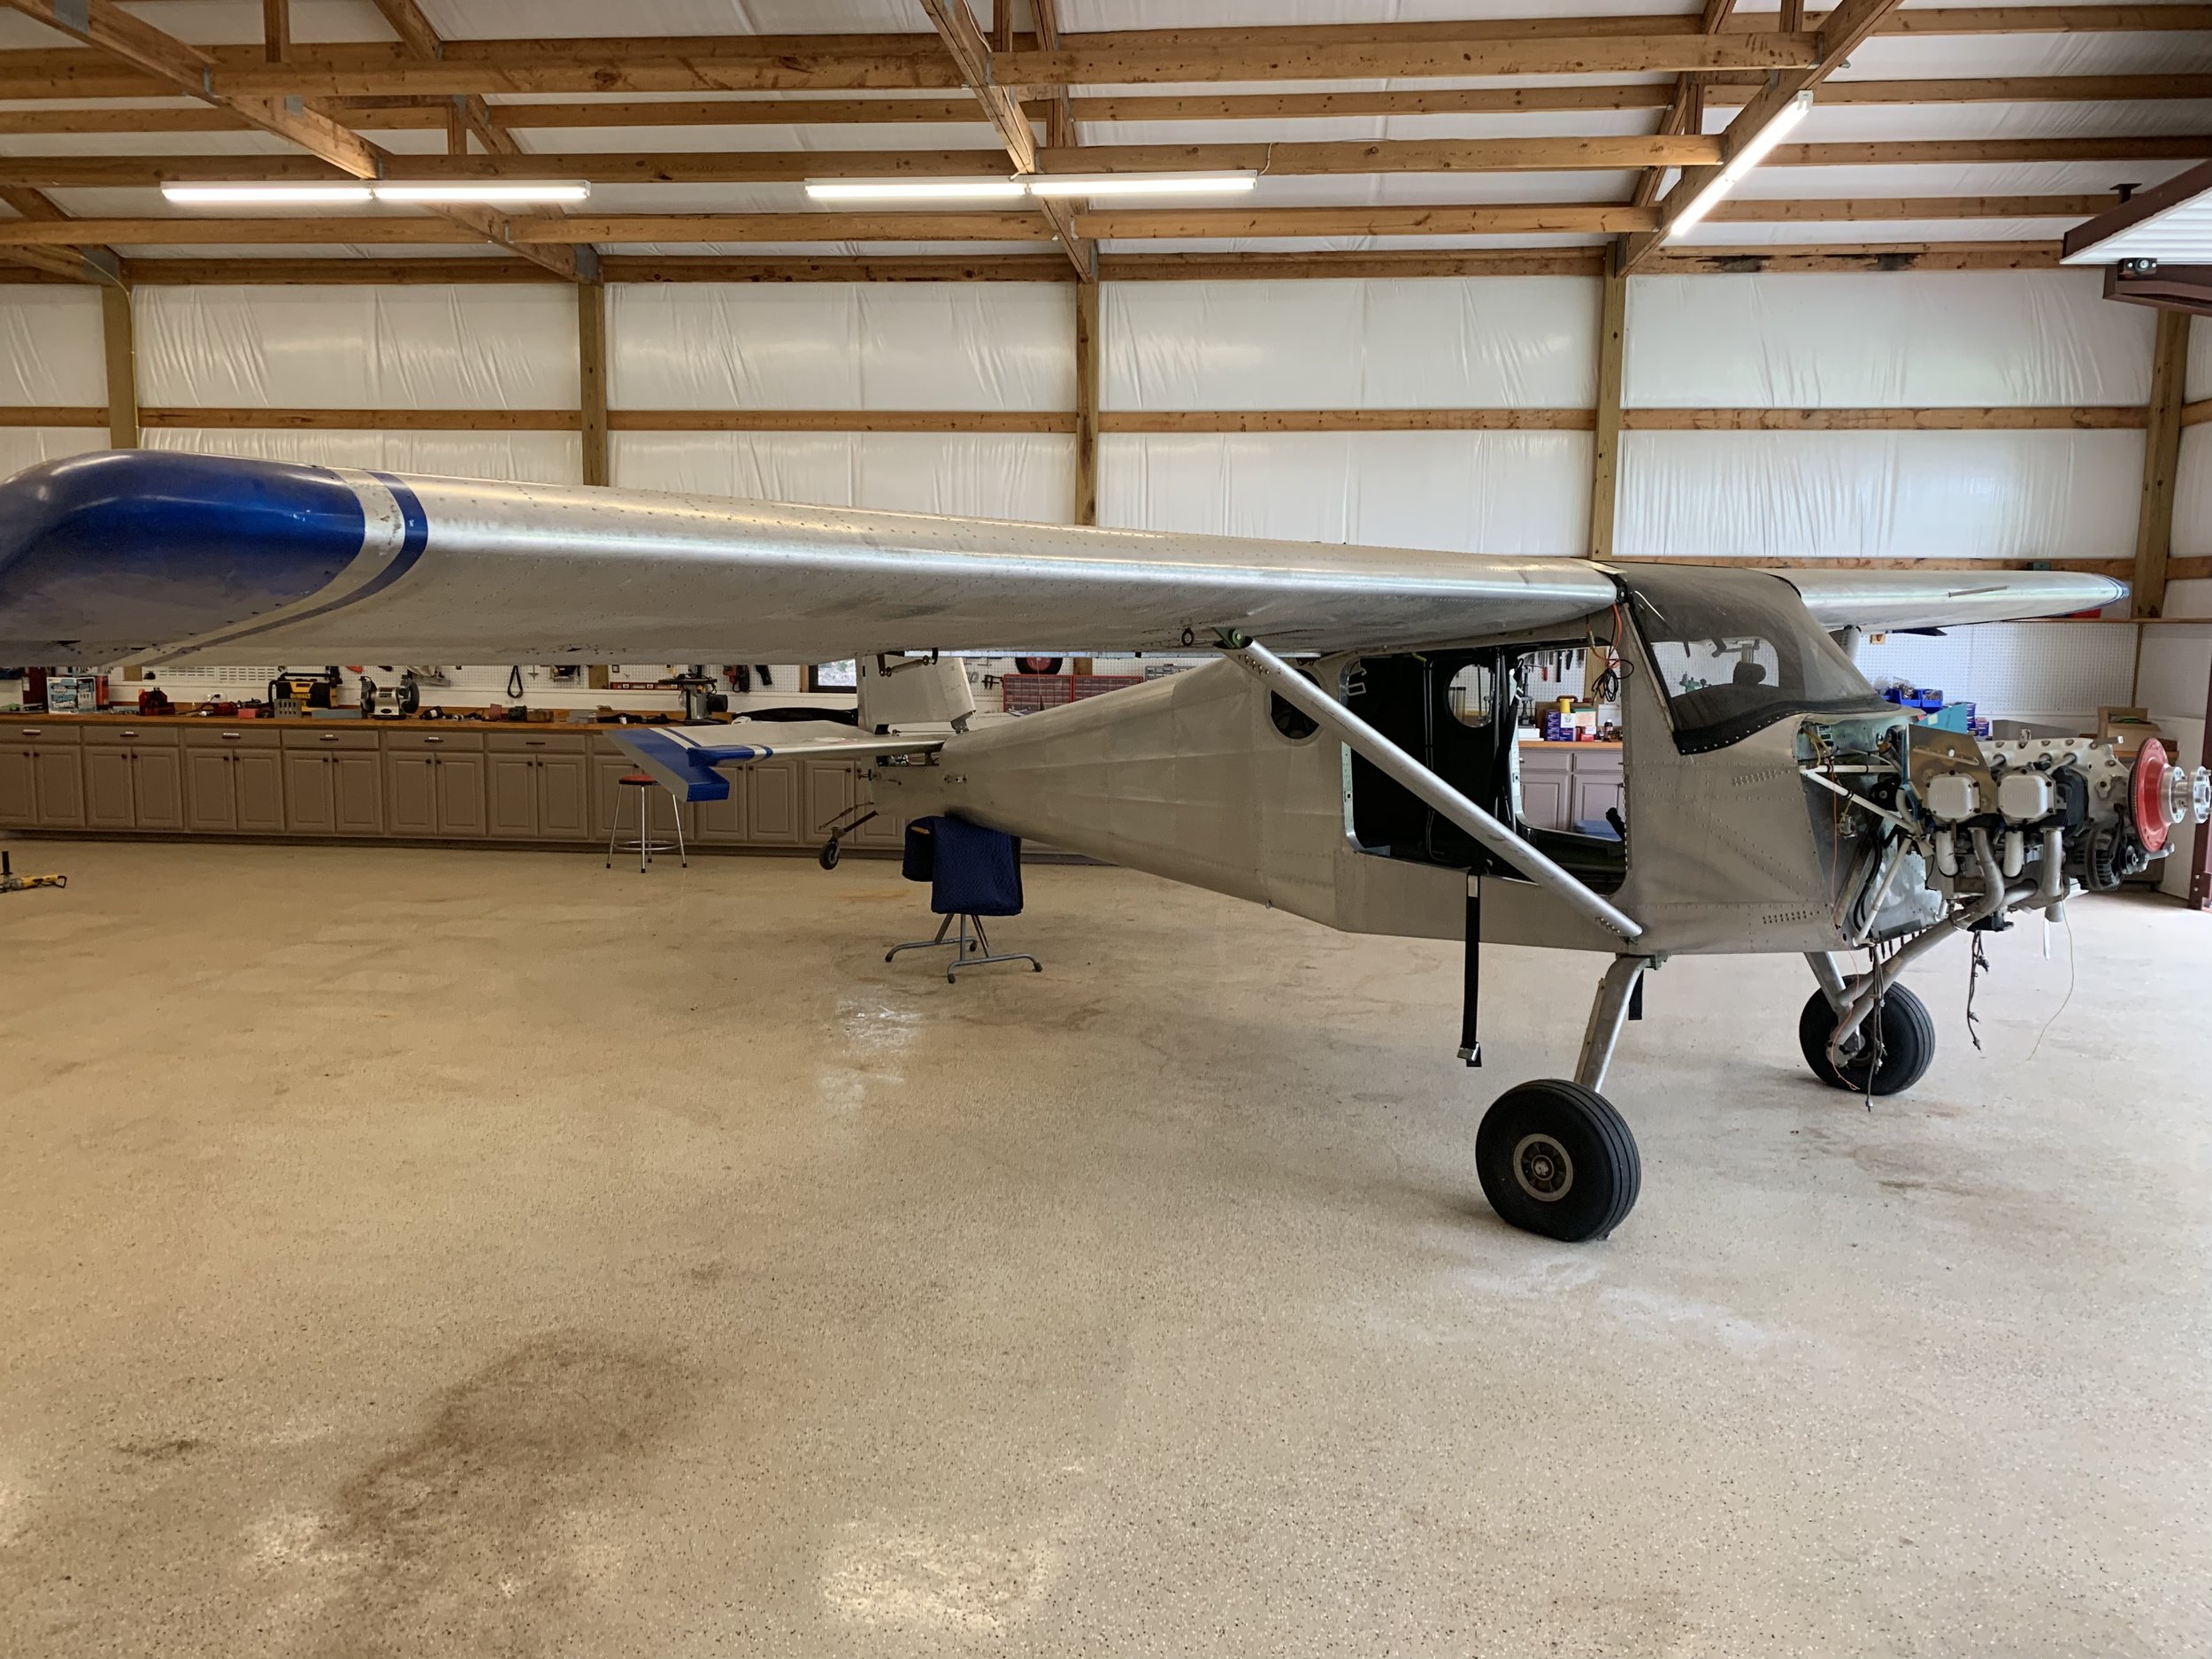
In our previous installment, we mentioned that there were pro’s and con’s to the Murphy Rebel. Our new shop plane is a Rebel Elite, which has several of the design issues already resolved. We will talk about all of that here, but we are going to focus on what we are going to do to simply make this an outstanding back-country plane. Undoubtedly, we will have some brain-storms (although they might be perceived as something else entirely), and we will address those as they come up. Our first pass is as follows:
PRO’s
Simple, Basic and Inexpensive
These Murphy aircraft are just basic airplanes. They do away with frills, and pursue a purely utilitarian role. It’s not an airplane that compels you to go out and polish it, a Murphy kind of begs you go out and fly it.
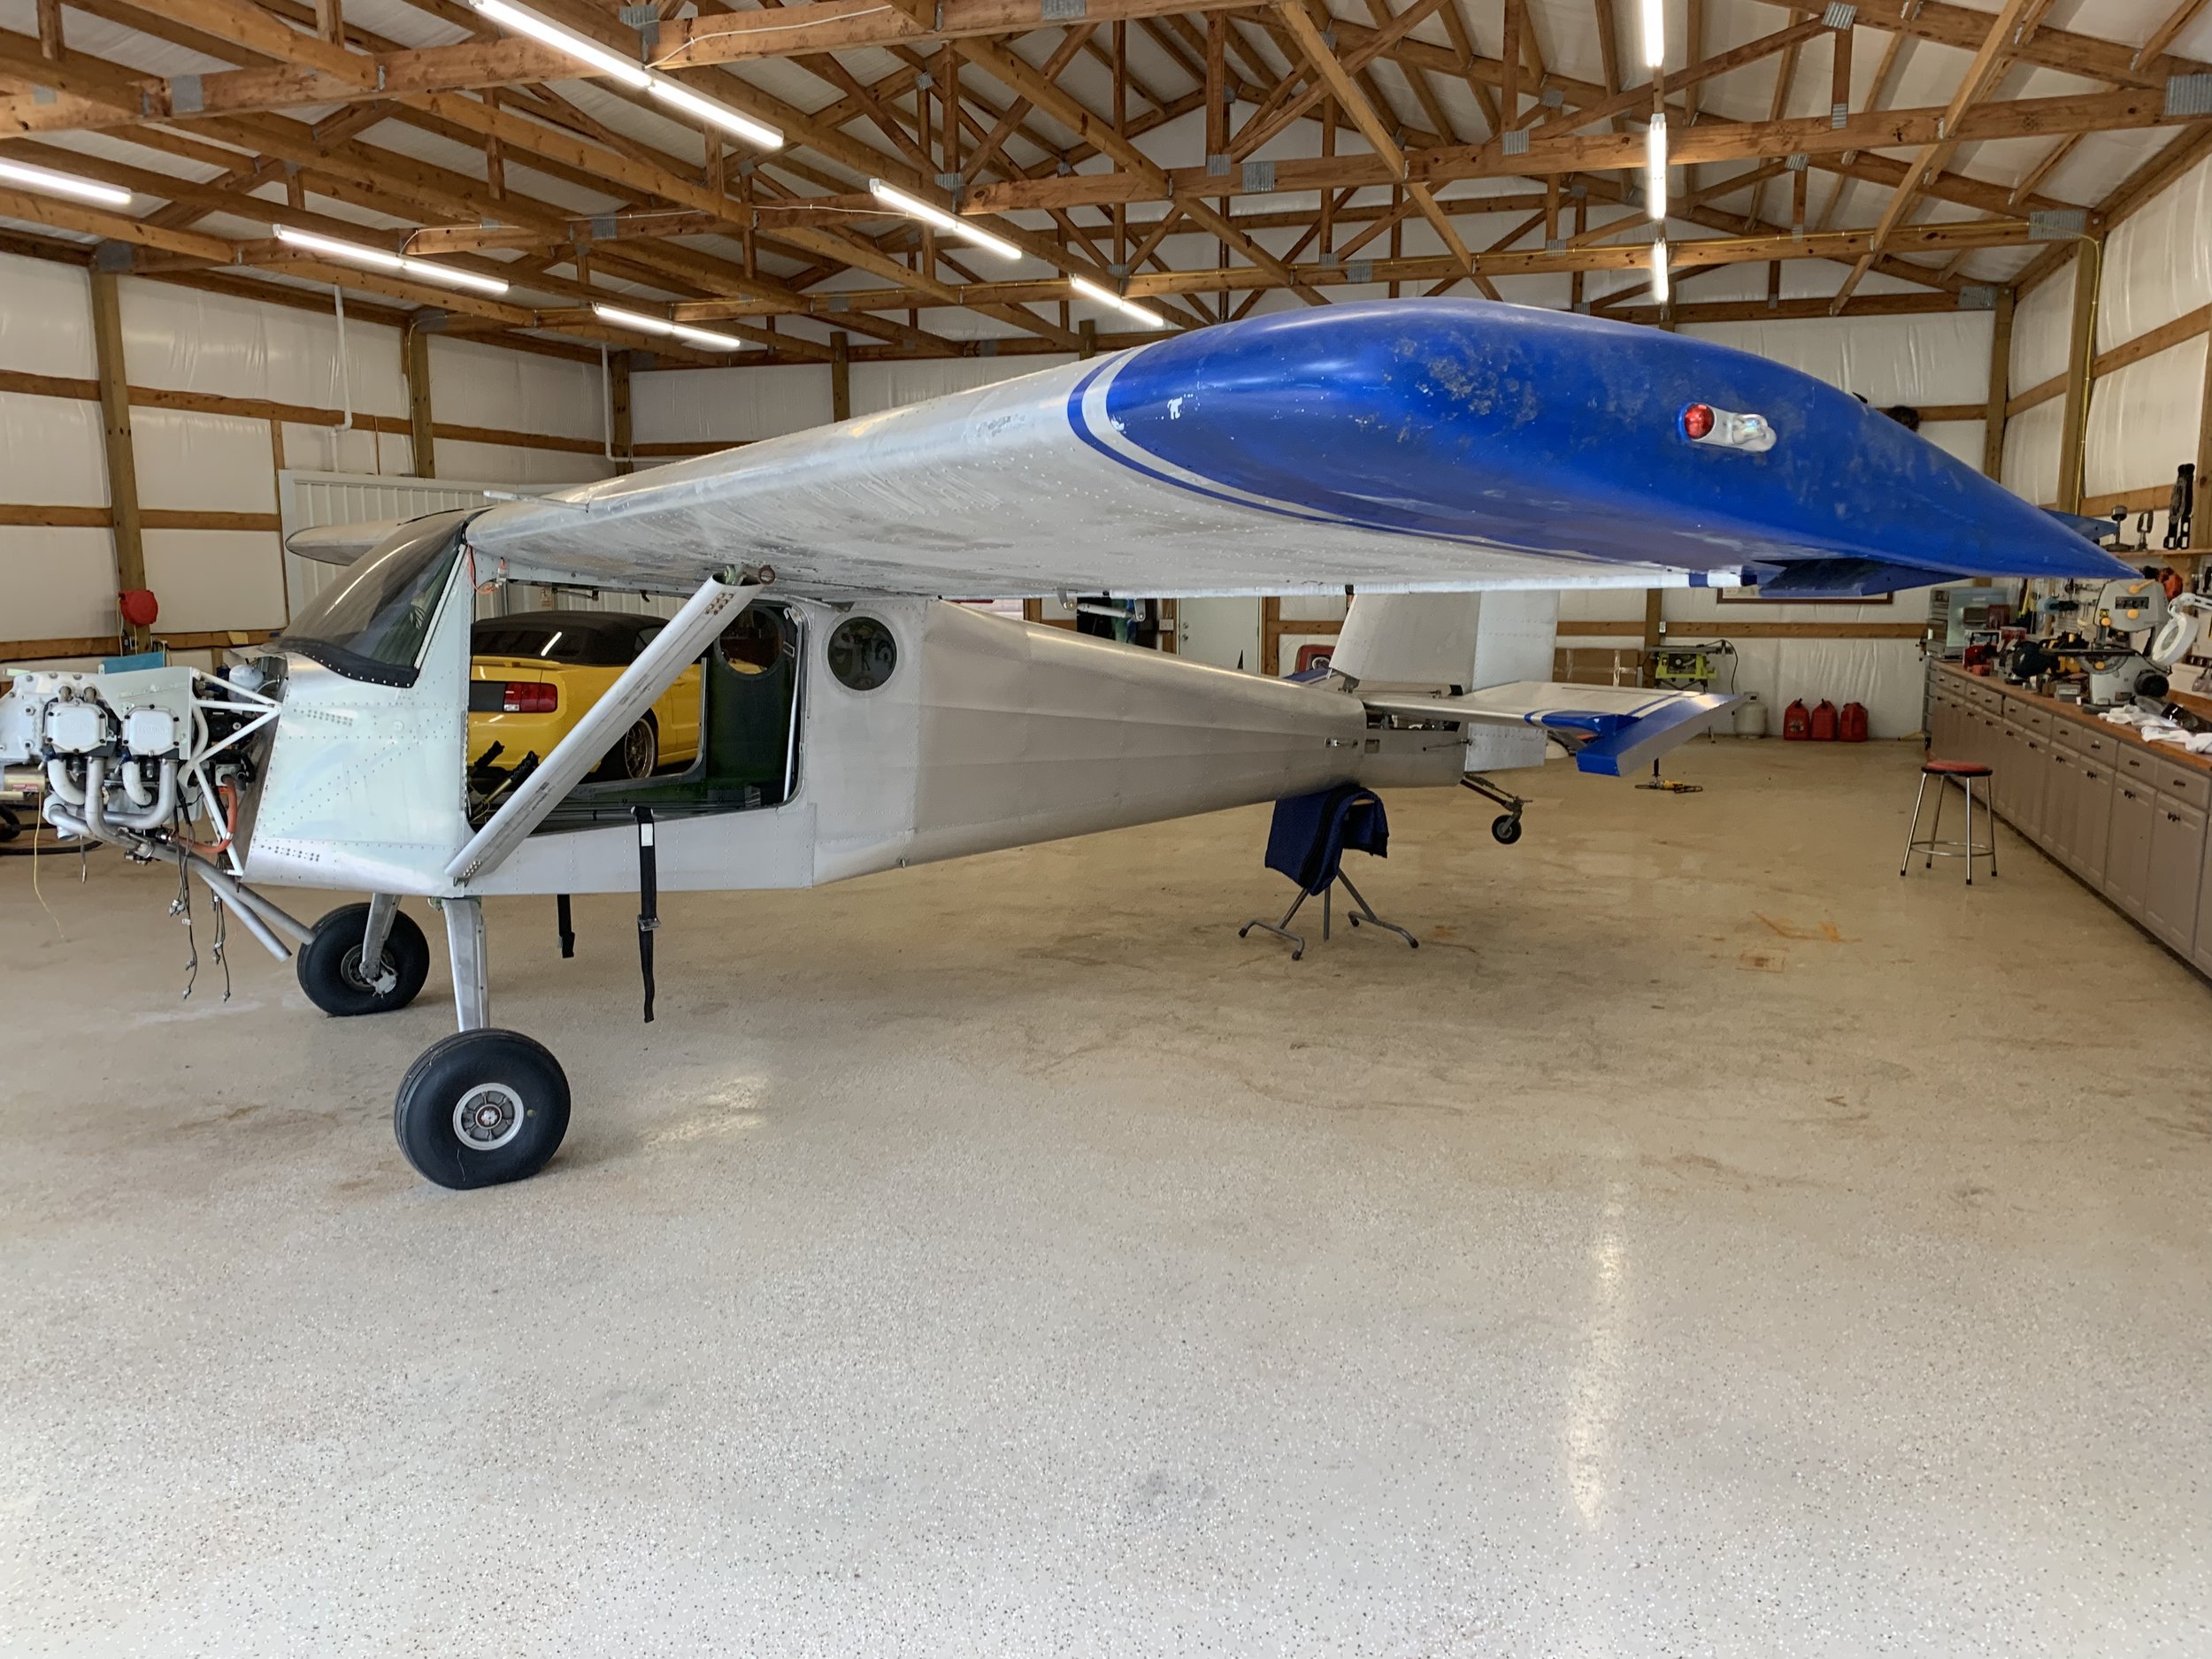
It’s got a LOT of rivets in it, and it gives you the feeling that it’s securely over-designed. It’s a rugged little aircraft. It was designed from the get go to take you off the beaten path and bring you back. It’s a pretty good little load hauler, and it’s unbelievably roomy. Not only for the pilot and co-pilot, but all their stuff, too. The baggage compartment is absolutely HUGE, at least in comparison to competitively sized and performing aircraft. In fact, there is actually a third seat option for the baggage compartment area, and there’s actually plenty of room back there for the seat and its occupant. The Elite model even has a raised roofline, that adds about 4” of additional headroom, making it even roomier. It should also be noted that this is clearly an outdoorsman’s aircraft. It’s 44” wide at the front of the baggage area; and the floor, all the way back to the tail-cone, doesn’t have any obstructions (unless the builder opts to locate something there). Murphy is quite clear that this space was intended as sleeping space when camping. Tent campers at airshows and grass strips are always envious…more so when it rains.
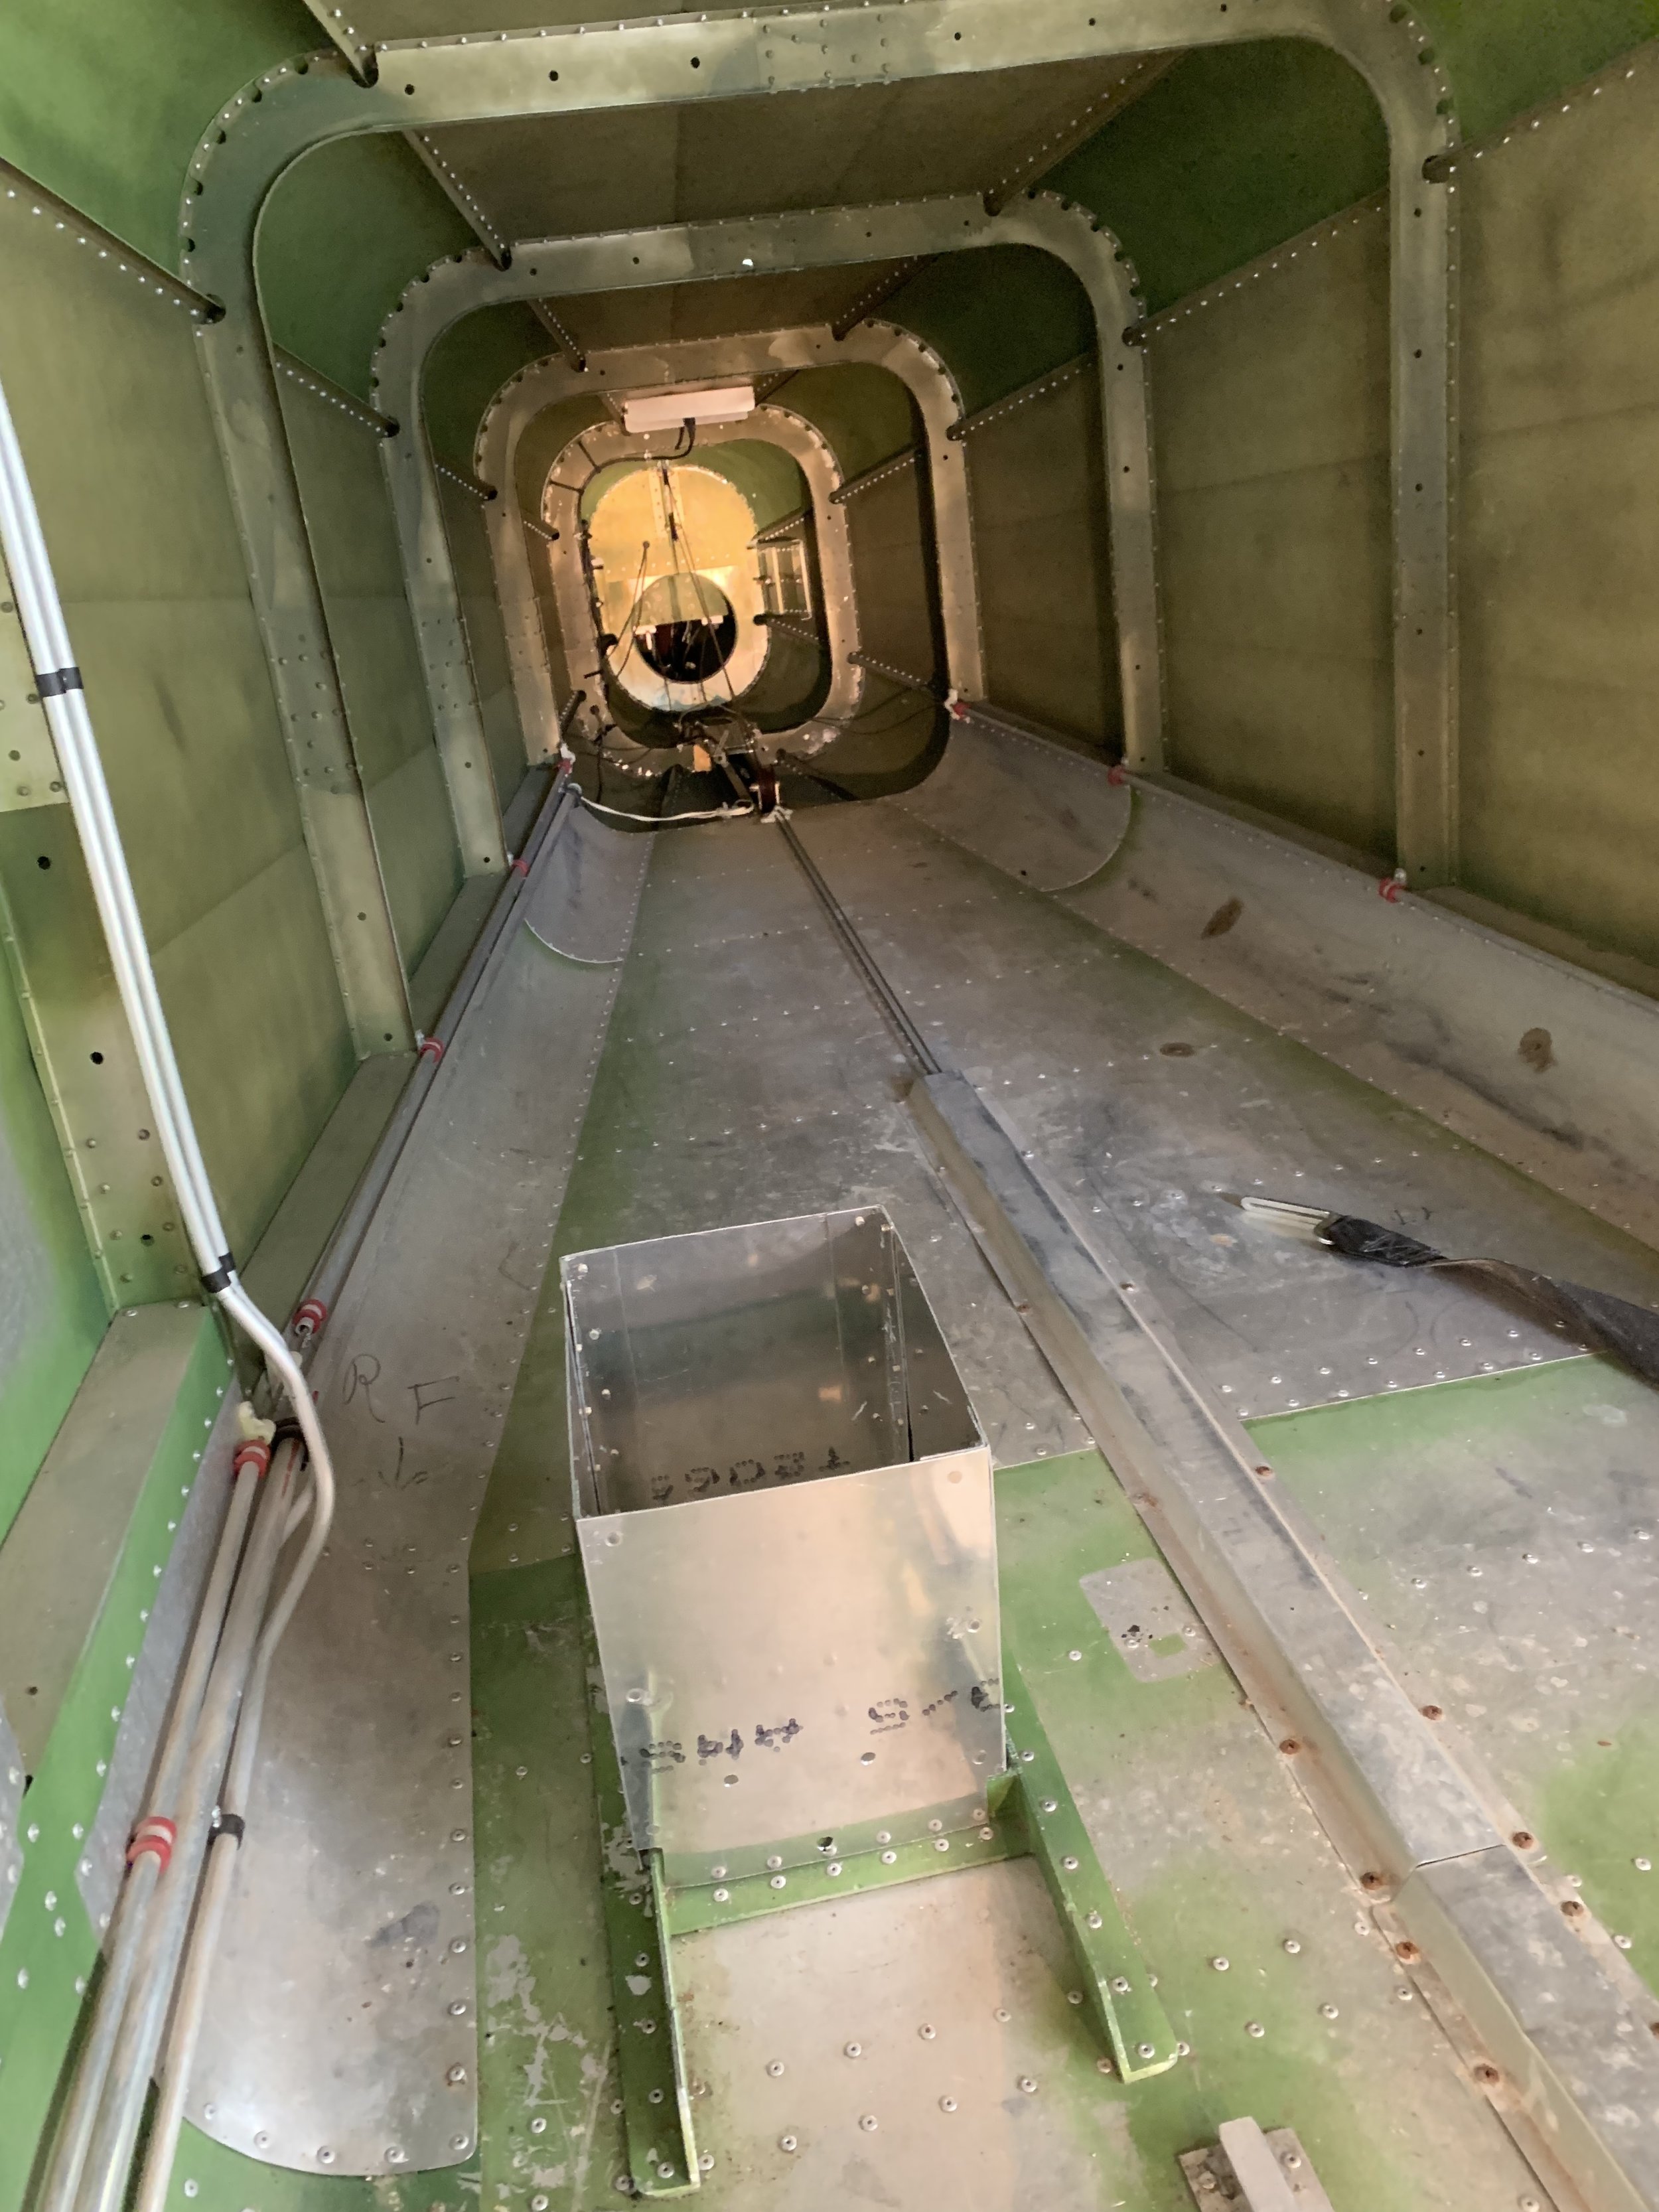
(Don’t put your battery box here…it puts a kink in your neck when you have to use it for a pillow)
Tough and Rugged
Everything on the plane is beefy. It appears to be designed from the start for float plane operations. Every Murphy I have seen has float attach points built in. It’s my impression that float flying tends to test the strength of an airframe, and you never hear anybody say that the Murphy airframes (or the Murphy floats themselves) are not up to the task. The original Rebel had a list of reinforcements that needed to be made after some experience was gained on the numerous airframes that were out there flying. I believe this list was called the Ontario Mods, and most builders/Owners went back and made them. It is my understanding that the Elite incorporated all of these mods or a structural improvement designed to make the mod unnecessary (where relevant) as part of the base design. There are still a couple of newer, Elite specific Service Bulletins that will have to be addressed, though. We will cover these as we do them.
Good Load Hauler
With the mods taken care of, along with some further structural enhancements, the Elite got a 150 pound gross weight increase, bringing the maximum weight up to 1800 lbs. This gives (typically) +/-800 pounds of useful load, which is a LOT for an aircraft of this size. With a full fuel load of 44 gallons on board, this still allows for those two fat guys we talked about earlier to get in and go, along with their gear.
Appealing Lines
I mentioned that the Rebel was a little boxy looking. It appears to my eye that the raised roof line of the Elite may have helped a little here. It’s not sleek or sexy, but it has handsome lines. One of the original Rebel designers was also a designer on the de Havilland Beaver, which to my mind IS a handsome aircraft. Some folks have called the Rebel the Mini-Beaver, and there is definitely a resemblance…even more so with the Elite.
Good All-Around Performance
The performance of this aircraft is a little hard to describe, because it’s not really the best at anything. There is also not much that it doesn’t do reasonably well. It’s just a basic all-around good airplane. It’s docile in its flight characteristics, and never does anything unpredictable. It doesn’t do drastic wing drops in stall, and it stalls pretty slow…if you can get it to stall at all. The old Rebel would stall gently, with power off and full flaps at about 36 knots, and it wouldn’t stall at all with power on. It leaped off the runway, even with that little O-235 engine, and never took more than about 400’ to do it. And with the slow stall speed, you could kind of plop it down and not have much of a roll out. That made it a legit STOL aircraft. It’s not the kind of performance that’s going to win Valdez, but it’s the kind that will get you in and out of all but the most radical back country airstrips.
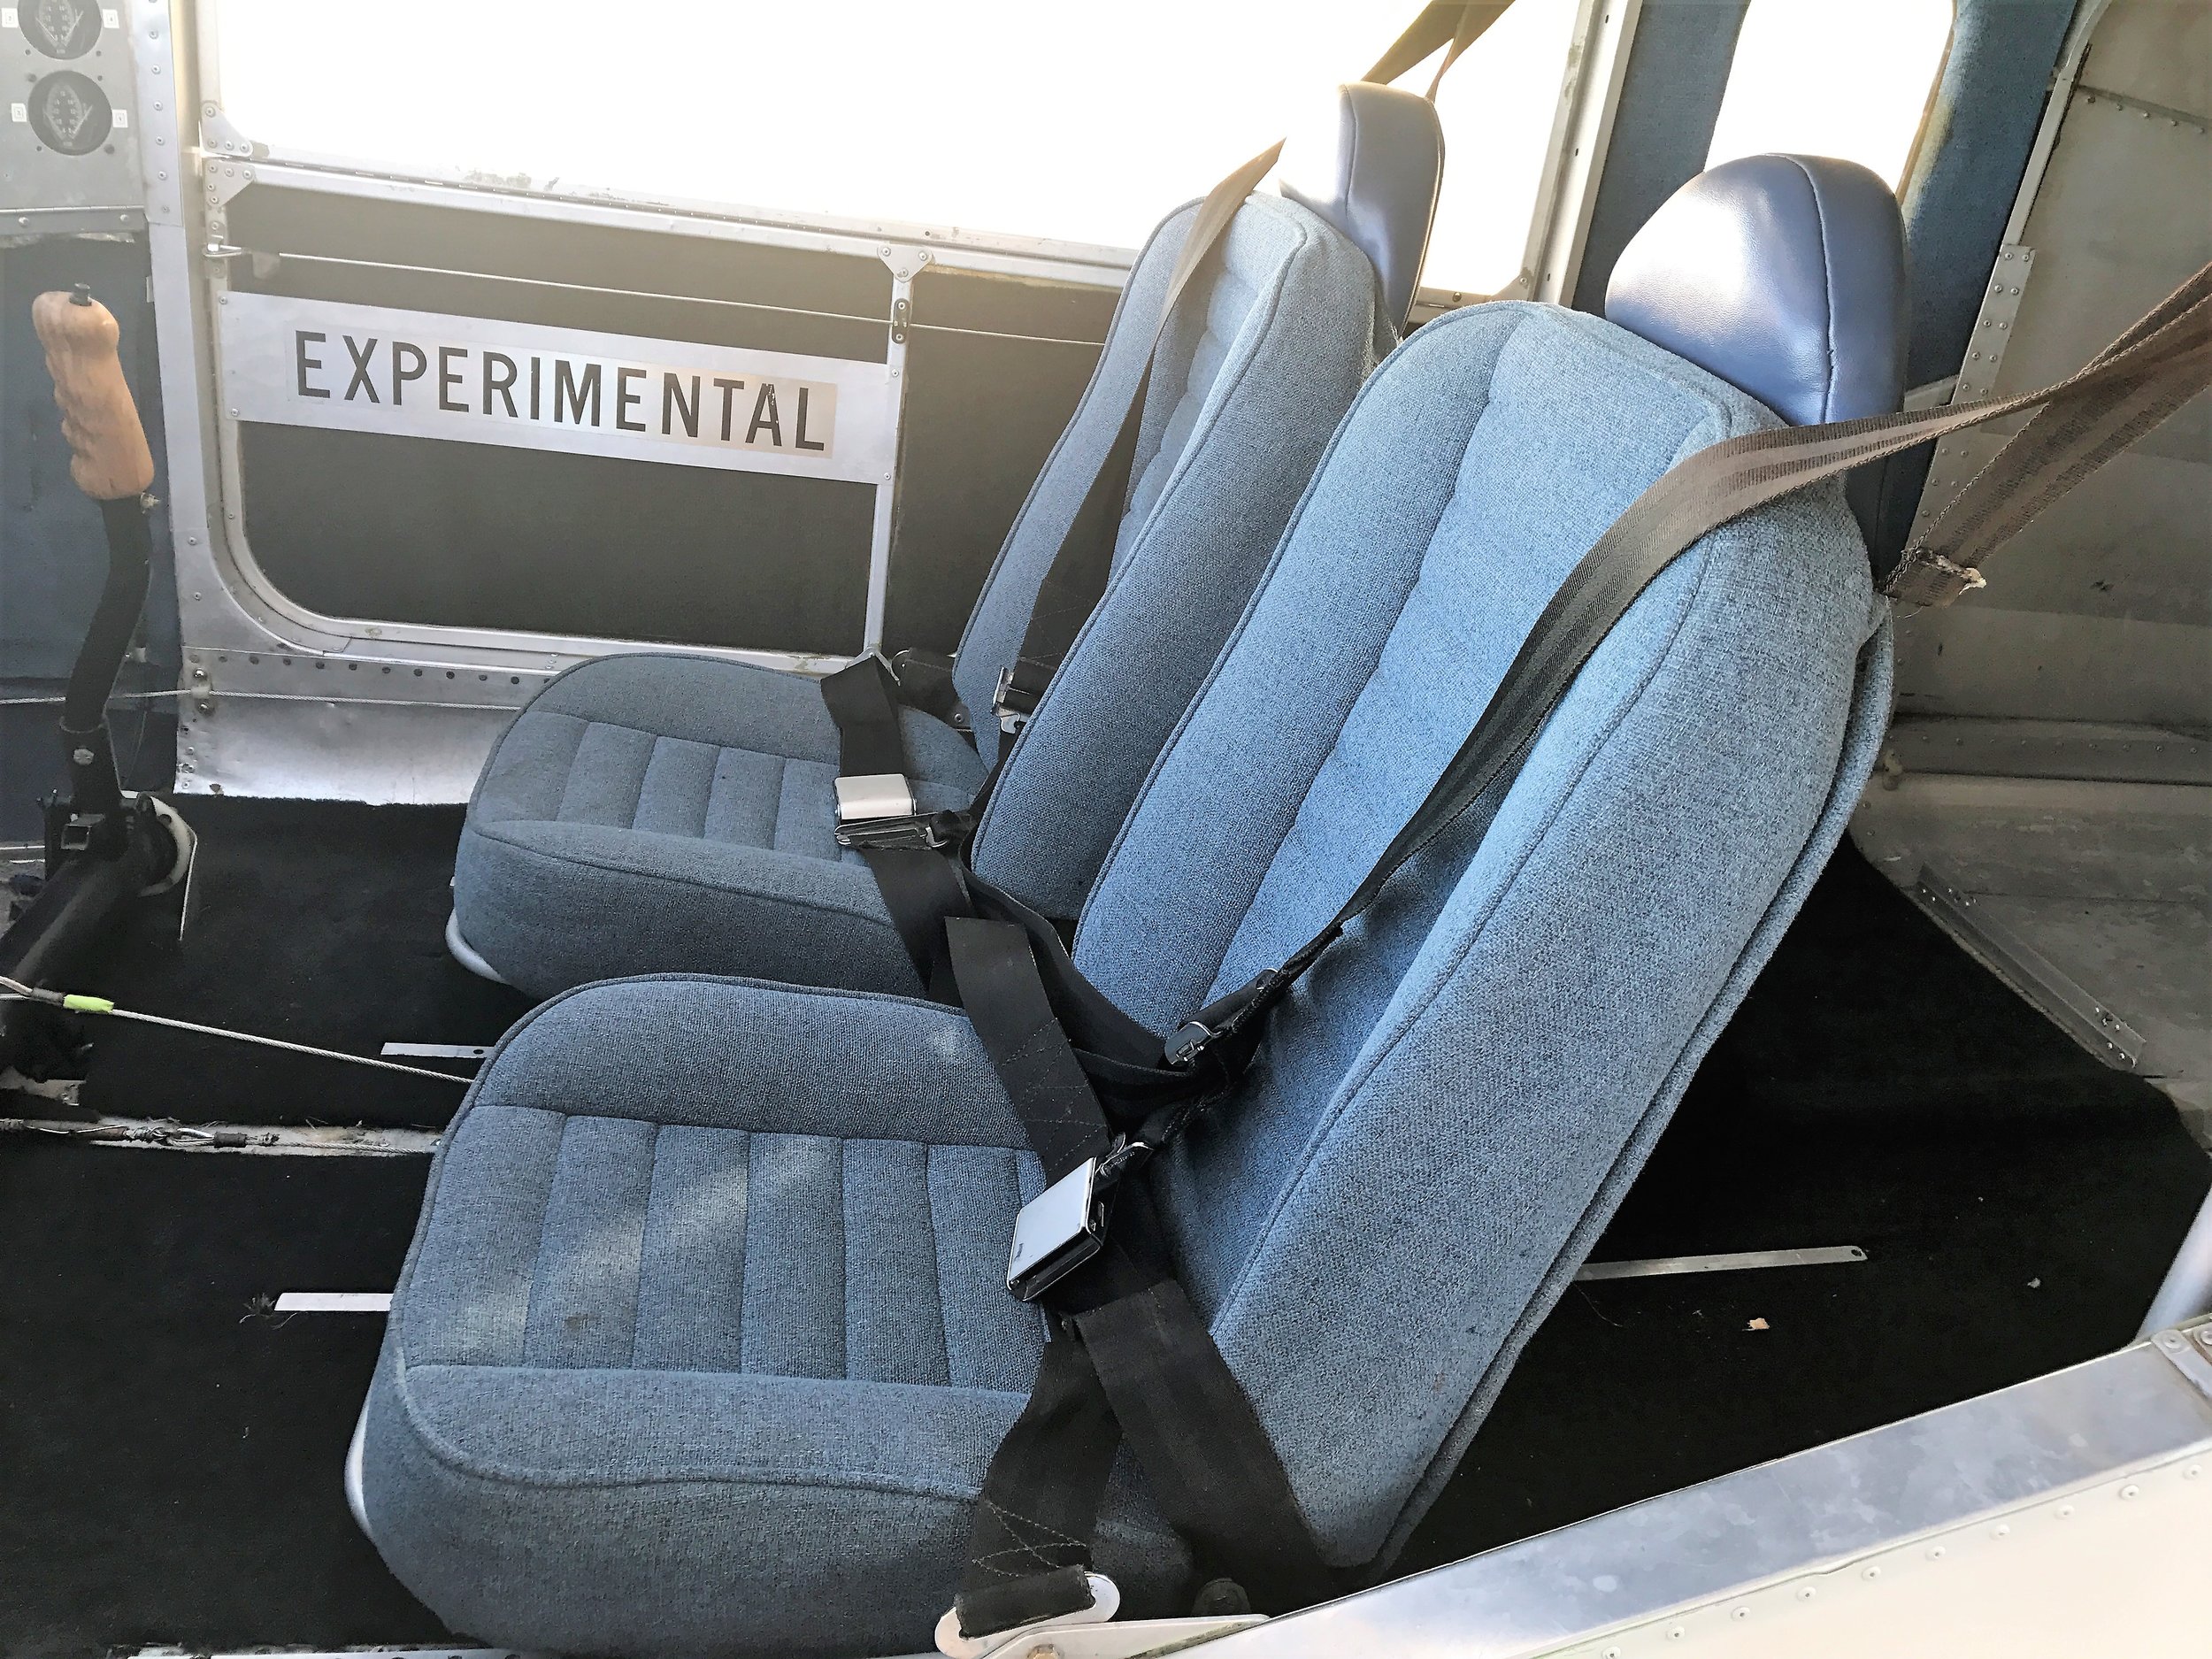
There should probably be a special mention of the seats. These are probably the most comfortable kitplane seats ever. Most kitplanes have some sort of velcro’d on cushion thing or a canvas “lawn-chair” seat design that frankly doesn’t cut it. The Murphy’s have legitimate seats with an adjustment mechanism that works like most certified aircraft. It gives you a feeling of being one with the airplane. It’s not heavy, but you feel solidly in place when you jump in.
Hopefully that will give you a feel for why we think our new shop project is going to be a great back-country plane. It has a solid basis for doing so. Next however, we are going to address the weaknesses. We will be developing a plan to address each one of these, but for now, here are the issues as we see them.
CON’s: (Design)
Spring Gear and Spring Gear Attachments
Spring gear sucks. Spring gear that is mounted the way Murphy designed the Rebel (and the Elite) really sucks. In fairness, Murphy didn’t do anything that others don’t also do. In fact, I am fully aware that thousands and thousands of certified aircraft use spring gear…and they mount them exactly the same way Murphy does. Let me explain why I say this. The Murphy spring gear (and the other manufacturers) use an individual gear leg on each side. This gear leg is made of spring steel or aluminum, and flexes to provide impact cushioning on take-off and landing. The main benefit of spring gear is that it’s cheap, simple and adequate for the most part. What it isn’t is a top notch shock absorber…or failure proof. These gear legs are secured to the airframe with a single through bolt. There are typically two clamp bolts that, along with some blocking provide alignment and positioning, but they do not pass through the gear leg itself. Anyone see a problem with this? That single through bolt is highly stressed in tension. In the event of that single bolt failing or stretching, what you are left with is a terrific lever arm (gear leg) and an impressive fulcrum (the bend in the gear leg) acting on the airframe and bending and wrinkling lots of perfectly good aluminum. If the bolt actually breaks (highly likely once it starts to stretch), the big flopping gear leg is going to pull your brake line apart, kick the tire out to the side, and make for some very interesting ground handling circumstances. There will be a substantial wing drop on the affected side. The tip will probably hit the ground. Your prop tip might too. Don’t ask me how I know…

After noting the spring gear suck factor, I am also aware that spring gear sucks less than bungee gear. But it’s 2019 now…we can quit complaining about bungees being 1940’s technology. Bungees are ancient history…you don’t even hear about bungee jumping anymore. So we will be converting our Elite to just old technology (as opposed to REALLY old technology) and put a shock absorber system on it and eliminating the spring gear. There will be some challenges to this, since the airframe doesn’t have provisions for the rear attach points of a “V” style gear leg members, but solving problems is what we do here.
Flaperons:
The Rebel had flaperons, which is a single piece performing the duties of both the flap and the aileron. They were fabric covered, which was a departure from the all-aluminum construction exhibited everywhere else on the plane, and looked a little cheesy. Flaperons make the controls fairly heavy, and they did not help with low speed control. That’s a big problem for a STOL type airplane. Fortunately, Murphy went back to a much more conventional separate flap and aileron in the Elite design and they are aluminum skinned. The ailerons drop when the flaps are deployed, providing the increased lift the flaperons were supposed to provide, while allowing the ailerons to provide much improved low speed effectiveness. We don’t have to do anything here, Murphy took care of us, and provided a much improved design. On another note, the flap handle is about 1000% better on the Elite as well. The handle is still in the same approximate location, which was overhead and forward, centered between the pilot and co-pilot. That’s the right spot. But now it is substantial, and much more comfortable to the hand. It has a squeeze lever release, just like it ought to, and it’s easy and comfortable to actuate. In the old Rebel, it was just a piece of flat bar stock that was like holding an aluminum ruler. You essentially used the slop in the assembly to pull the indexing pin out of alignment with the index holes to release it, and then wiggled it fore and aft till it dropped into the flap position hole you wanted (hopefully). Worse, mine didn’t originally have a stop on it, which meant that it would go past the full flap position. It didn’t go far past, but when it did, it would lock up the ailerons. I had flown it quite a bit when I discovered that. I get a little chill every time I think about it. Fortunately, the Elite has the flap and flap handle issues resolved nicely.
Door/Window Opening
Doors and windows are where most people look at the Murphy and say Whiskey Tango Foxtrot! I think this may be one place where the search for simplicity, low cost and utility in design may have gone too far. The basic design is a spring- loaded latch at the rear of the door, connected to a plastic-coated aircraft cable, that stretches the width of the door…on the inside. There is no external access to the latches. The window is hinged at the top of the door and swings out and down. So…in order to open the door from the outside, you have to get the window open and lowered, then reach inside the door, and push, pull, or stretch the cable to let yourself in. In the old Rebel this window unlatching operation was accomplished by actuating a second spring loaded latch at the top of the window. This doesn’t sound all that bad until you realize that there was no outside access to this latch either. This was resolved by means of a string that was carefully left dangling out the bottom of the door upon a previous exit from the aircraft. If you forgot to verify that the string was hanging out, you had to cross your fingers and hope that whoever got out of the co-pilots side last remembered to drop the string out that side, because you were locked out if they didn’t. Even if fate was smiling on you and there was at least one string dangling from a door, you still needed to pry the window open with a fingernail or something because there was no external window handle. The Elite has progressed to the point where there is at least an externally activated dog, complete with a little knob to grab and pull on, that allows you to open the window. But you still open the door the old-fashioned way, by reaching in and yanking on that cable. I understand the idea of keeping external protrusions to a minimum, but that really doesn’t apply to aircraft like these. They have the aerodynamics of a brick. A little latch handle on the outside of the plane would probably be the least draggy thing on the plane.
Access
The access to both the Rebel and the Elite, is a mixed bag. I was always impressed by how easy it was to load and unload items into the baggage compartment on the old Rebel. The door was big, and the seats were easy to slide forward, and back again when you were done back there. The Elite is even better, because the doors are even larger and the seats work as well or better than the old ones. On the flip side, both the Rebel and the Elite stand pretty tall. There is no step, and not really a great way to install a step. The spring gear is too far forward to mount a useful step on, and adding one to the airframe would require some serious disassembly, reinforcement and reassembly of the airframe. The solution to entering the plane was to kind of back into the door opening, slide up into the seat by pushing with your hands on the door frame, and then swing your legs in. It worked, but it wasn’t a very graceful entry. Exiting was a little easier, swing your legs out and jump. Depending on how cat-like your reflexes were, this could appear graceful…or not. We are going to take advantage of our new landing gear configuration to cure this problem.
Rivets and Stall Speed
The old Rebel had an interesting characteristic in that it didn’t exhibit a lot of buffeting prior to a stall. It didn’t have any bad stall characteristics to speak of, it just went from flying to not flying in the blink of an eye. I thought a lot about what the reason for that would be, and it occurred to me that there are a LOT of dome head rivets on the top of that wing, and it’s likely that at some point the air just won’t adhere to the top wing surface and just like flipping a switch, your lift goes away. The obvious solution to that seemed to be Vortex Generators (VG’s), and after installation, that problem went away. I think VG’s are almost mandatory for this wing. They aren’t standard equipment, but as far as I am concerned, they should be. We will be installing them on the Elite.
Panel
The panel is a funny shape. By that I mean it’s not flat across, like most panels. I guess you could call it something of an inverted “U” shape with a conventional middle section and angled panels on each side. On the Rebel, it was funny shaped…and short. It’s also a structural component of the airframe, so modifying it is not a great idea. We are going to make some magic happen in the Elite. I think it’s going to be outstanding. We will showcase that as we build her out.

Con’s (Builder)
Brakes
The brakes on the Rebel were the bane of my existence. They worked great whenever the fluid reservoir was full…which was almost never. It was plumbed with plastic tubing, which made it easy to see where the air bubbles were (which was everywhere!). I think most of the compression fittings had been overtightened, damaging the plastic line, and simply wouldn’t hold with any movement of the system. We are going to install a substantially more robust system on the Elite.
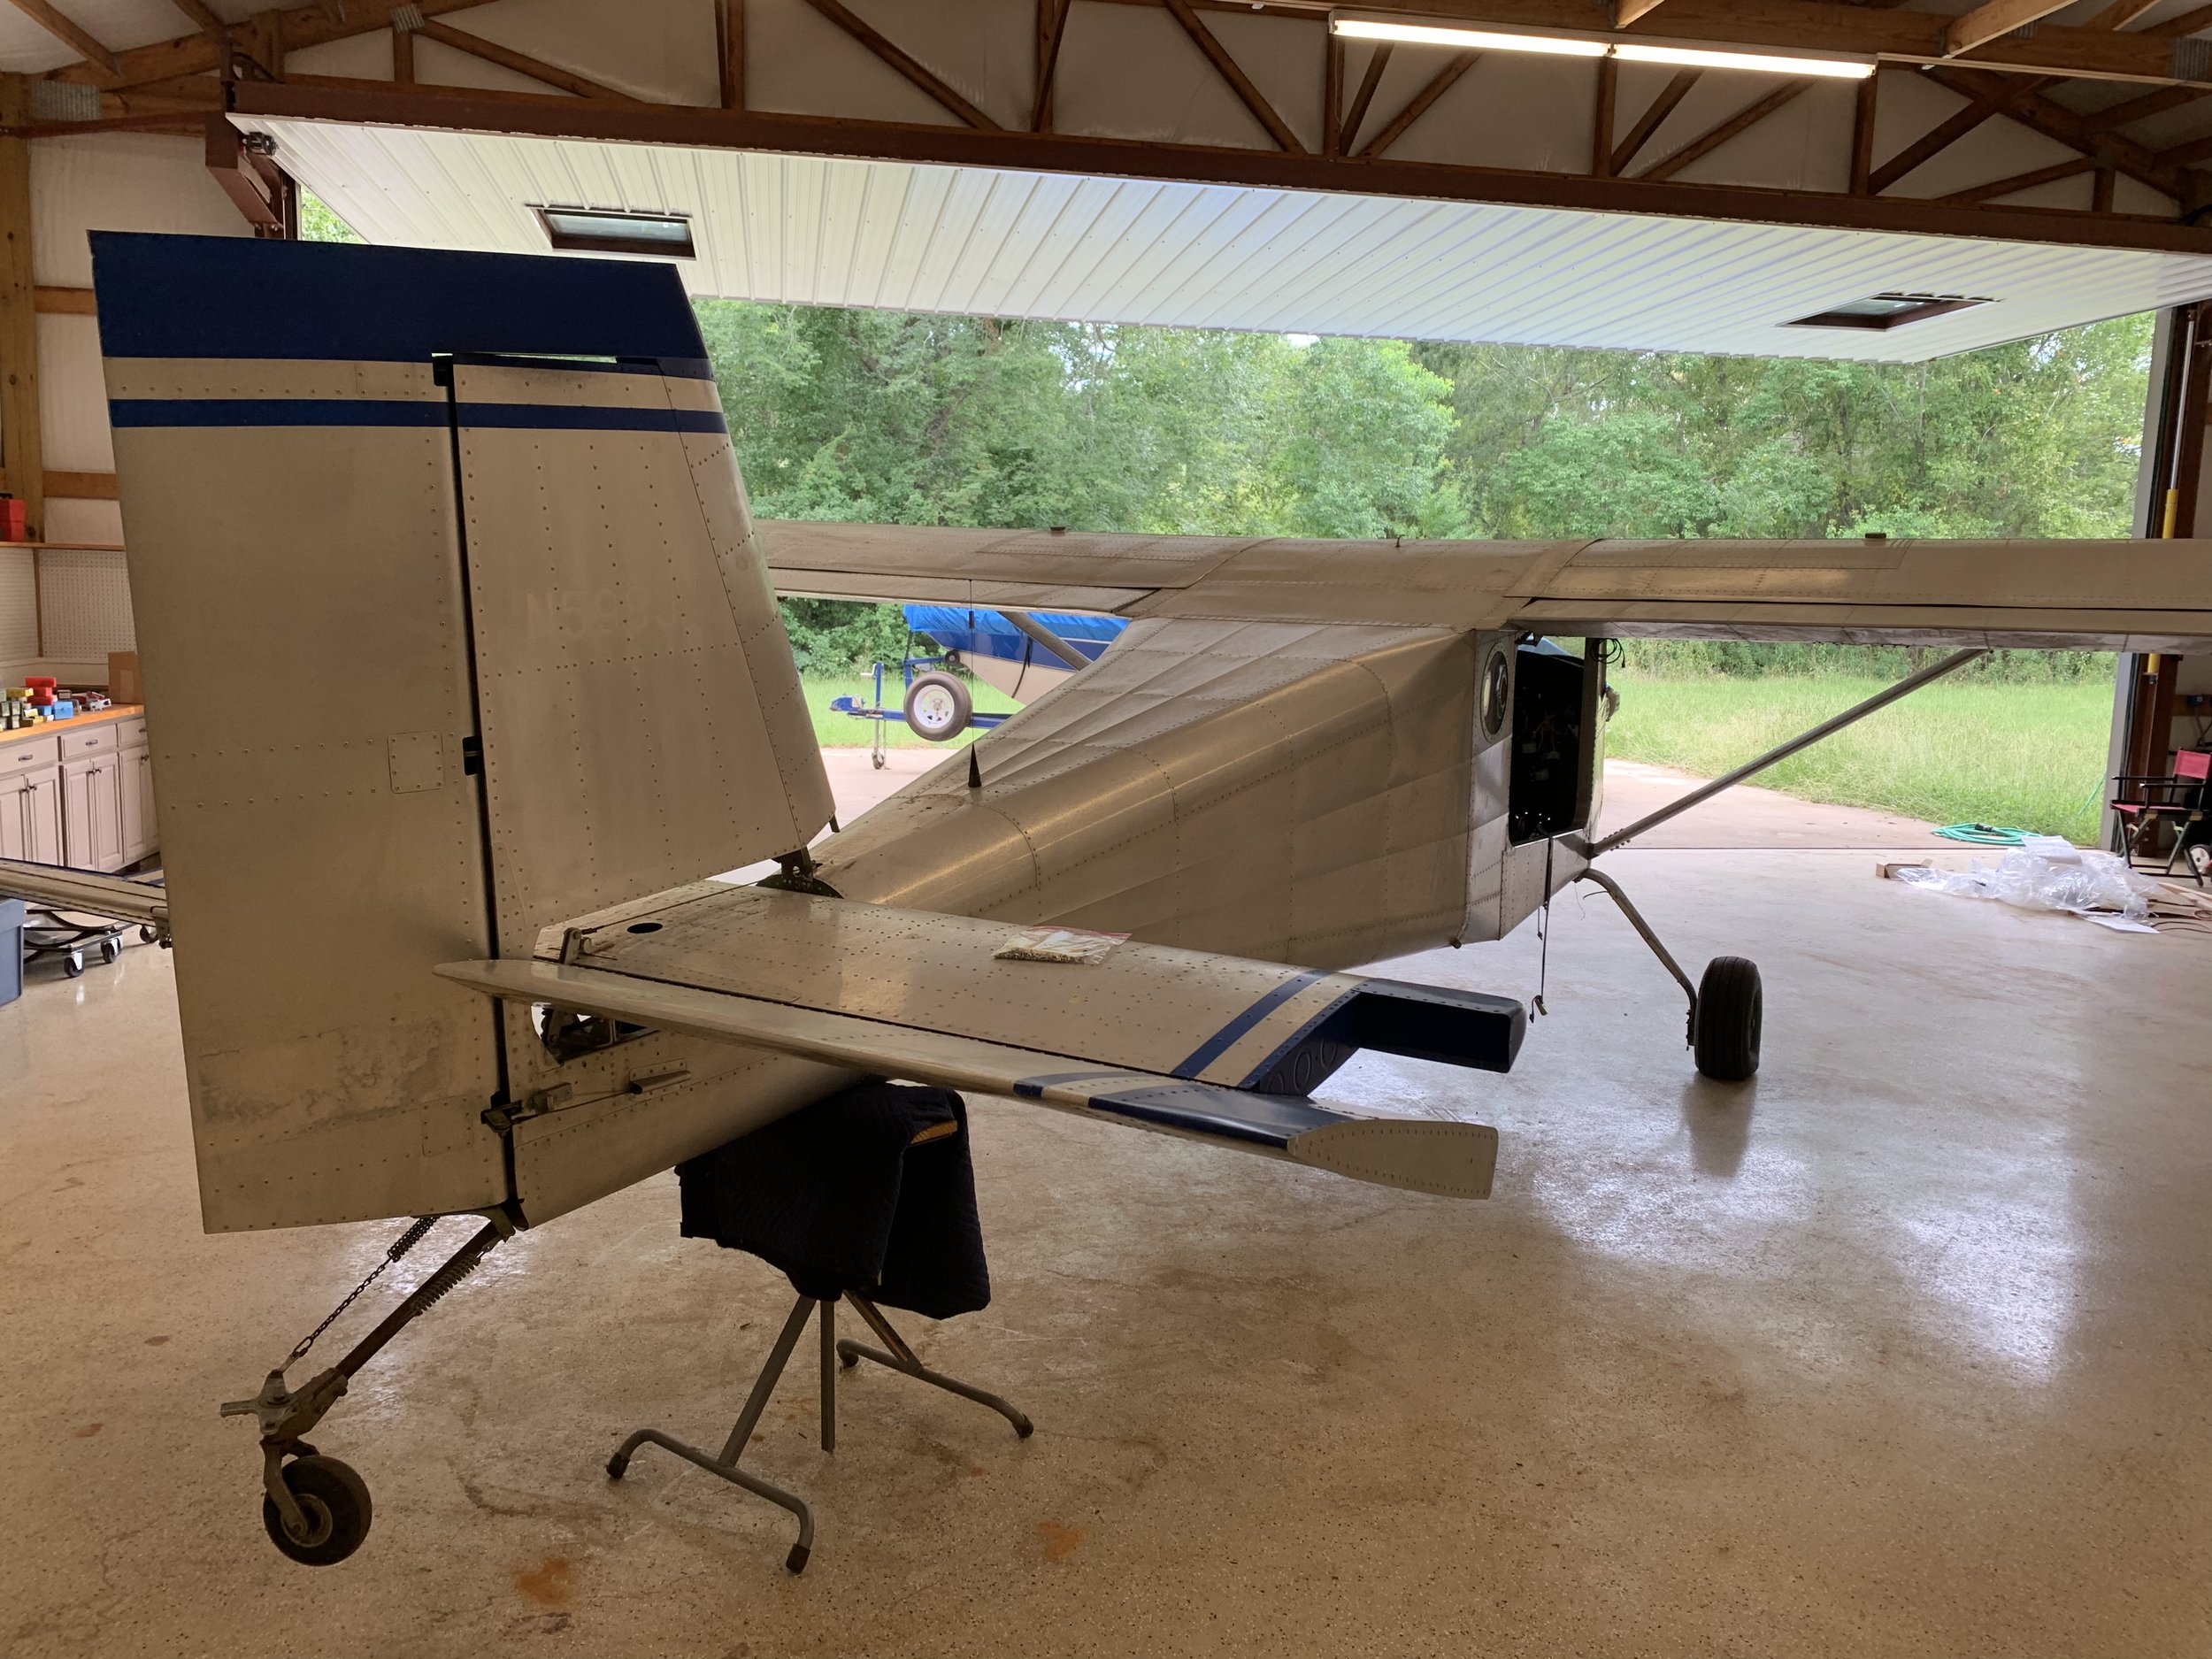
Tail Wheel
The old Rebel was a ground handling nightmare, at least initially. It came equipped with a Maule tailwheel, which in and of itself isn’t bad, but it wouldn’t lock into the steerable position, and when it did it wouldn’t unlock with engine power and rudder. You had to get out and give the tail some significant prodding to get it to go in any kind of controlled direction. It also had a VERY beefy single leaf aluminum tailspring that was a spring in name only. The geometry of both the spring and the tailwheel itself were all wrong, and the steering chains had way too much slack. We replaced the Maule tailwheel with a Matco tailwheel, and in the process fabricated a multi leaf tail spring from a set of trailer springs from Northern Tool. By heating, bending and oil quenching them at the proper angle, we were able to attach the Matco tailwheel so that the pivot was vertical. After setting the proper tension on the steering chains, magic happened and she handled like a pussy-cat. We are going to go way above and beyond what we did with the Rebel on our Elite build. The Elite has an entirely different tailspring set-up, and we are going to modify that for an outstanding back-country gear installation.
Undersized Engine
The O-235 Lycoming in the old Rebel performed quite well…but we are just above sea level. The 160 horsepower O-320 was the power plant of choice for that airplane, and for mountain/back-country flying, you should have all the power possible at your disposal. High density altitude in the mountains takes no prisoners. We are in a similar situation with the Elite. We have the 160 h.p. O-320 available, but now that Murphy has beefed up the airframe and increased the Max Gross Weight, the airframe is rated for the 180 horsepower Lycoming O-360. Murphy still recommends the O-320, unless the plane is float equipped, due to weight and fuel consumption considerations. We probably won’t put it on floats, but then, we’ve done crazier things…who knows what wild hair we might get. We will let you know how we intend to handle this quandary.
Spartan Interior
The old Rebel was probably beyond Spartan. Other than the seats, which were pretty decent, the rest of the interior was just about non-existent. It wasn’t even painted on the inside, let alone lined with rich Corinthian leather. We probably aren’t going to go overboard with the Elite either, but a couple of things must be addressed. A hollow aluminum airframe shaped like a megaphone is NOISY!!! It’s also an aircraft meant for the mountains, so it will no doubt see some cold temperatures. It’s going to need some insulation. It doesn’t need to look like it is a candidate for Lifestyles of the Rich and Famous, but it can’t look like an Alcatraz prison cell either. I’m not sure what we will do, but it will be appealing as well as light weight and durable.
Now you have been exposed the project aircraft. We wanted to do this introduction first, since it is not well known aircraft, especially in the lower 48. We will keep you posted as we progress. Stay tuned!
'>